Hello everyone!
“It is the time you have wasted for your rose that makes your rose so important.” - Beautiful thought of a great author!
Do you like roses? I adore them! Obviously Antoine de Saint-Exupery love them as well :-)


“It is the time you have wasted for your rose that makes your rose so important.” - Beautiful thought of a great author!
Do you like roses? I adore them! Obviously Antoine de Saint-Exupery love them as well :-)

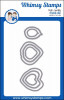
Today my step-by-step photo tutorial is for easy foamiran rose using Whimsy Rose Petal Flower Die Set.
All products used are from www.crafteezee.co.uk!
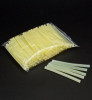
I started with cutting the petals out of white foamiran as it's shown on the picture. You can see that there are 4 layers of petals.

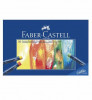
My next step was colouring them using Faber-Castell Oil Pastels. I like the colours to be varied on my petals, so I used two shades for the top, 108 and 128, and 172 for the bottom. I don't cover the whole surface but leave the white spots and this contributes to the more natural looking of the flower. Those petals were coloured both sides.

Further, I warmed everyone to the iron , scrunched the top and the bottom of the petal and twisted it backwards and forwards a few times, rolling it between my fingers (pc. 1). I gently stretched the middle part of it trying not to touch the edge (pc. 2). To give shape to the smallest ones, I used one of the smallest ball of the Flower tools (pc. 3).

I took a piece of kitchen foil, crushed it to make a drop-shaped core with a size 1 cm x 1.5 cm. To be comfortable for working, I punched a small hollow and glued a toothpick at the bottom of the bud.
Now was time to shape the rose bud! I stuck one of the smallest heart-shaped leaves (pc.1). Against the first one I stuck the second (pc.2) and the last two were placed stacking on to the first two (pc. 3 and pc. 4). In this way, I completely covered the foil core.

The petals of the next three layers were arranged successively, one after another, as it shown on the photos.

At last, I had this:

The last touch I added to my rose was rose sepals made from a square of olive green foamiran. I coloured their edges with an oil pastel 128, heated and twisted them in the way I explained above and stuck the calyx to the back side of my rose.

To finish my flower arrangement I added two rose buds and several leaves. It could be a wonderful decoration for a treasure box, an exploding box, a scrapbook album or just to decorate the wrist of some pretty lady :-)!


Thank you for coming around!
HUGS xxx


Приказна е, Ели!
ReplyDeleteБлагодаря, мила Маги!!!
DeleteВОСТОРГ!
ReplyDeleteСпасибо, Татьяна :-)!
DeleteWOW WOW WOW these are amazing and now I shall have a go at making some myself. Thank you xxxxxxxxxxxxxxxx
ReplyDeleteGo for it, Jan! xxx
DeleteThis is such a great resource that you’re offering and you provide out at no cost. I appreciate seeing sites that realize the worth of offering a perfect useful resource totally free. I genuinely loved reading your submit. Dry Rose Petals Exporter
ReplyDelete